Showing posts with label Memorial Day. Show all posts

Friday, May 22, 2020

Slow Roasted Brown Sugar Pork Ribs for Memorial Day, 4th of July, Labor Day or Any Day Delicious


Stafer-at-home means being careful but it doesn't mean we can't enjoy a great summertime feast. Memorial Day, Fourth of July, Labor Day and any day, we can enjoy a meal and celebrate life even during a pandemic.

For me, that means making pork ribs.

My mother taught me to make pork ribs with a thick coating of sauce sweetened with brown sugar and raisins. Eating those finger-licking ribs was one of my favorite childhood memories.
Everything changed on a busy research trip to Abilene and Fort Worth, when I ate at 25 restaurants in 36 hours. I fell in love with West Texas BBQ.
At restaurant after restaurant, I watched grill masters lay bundles of mesquite into their subcompact-car-sized smokers. With the heavy metal doors open, the wood crackled as flames enveloped the logs The grill masters seasoned their racks of pork ribs with thick, grainy coats of brown sugar and spices rubbed onto the meat.  Waves of dry heat radiated from the smokers. But the heat that would cook these ribs would come not from an open fire but from smoldering mesquite embers.
When the doors were closed, the blazing logs were starved of oxygen. The flames died and a delicate smoke filled the air. At that moment the grill masters loaded in the racks of ribs coated with sweetened dry rub. Hours later, the ribs were removed, their outer coating thickened to crispness, creating what grill masters call “bark.”
I loved those ribs even more than the ones from my childhood.
At home, without the benefit of a smoker, I experimented for years to duplicate that sweet-crispness. Nothing could ever recreate the wonderful mesquite smokiness but I did succeed in making ribs with bark as good as any I enjoyed in West Texas.

High heat versus slow cooking
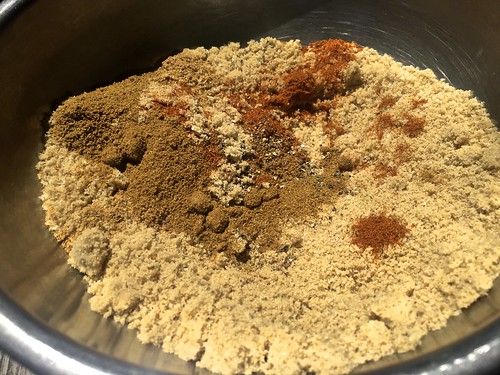
Mix of kosher salt, black pepper, brown sugar, cumin, coriander and cayenne for dry rub slow roasted pork ribs. Credit: Copyright 2016 David Latt

Mix of kosher salt, black pepper, brown sugar, cumin, coriander and cayenne for dry rub slow roasted pork ribs. Credit: Copyright 2016 David Latt

Cooking with high heat is exciting. There is great pleasure in watching the pyrotechnics of an outdoor grill as sizzling fat catches fire.  Roasting at low heat in the oven lacks that excitement.
And yet, what happens in an oven set at 250 F has its own kind of magic. In the darkness of the oven, the waves of steady heat melt the fat inside the rack, tenderizing the meat and gently fusing the dry rub to the outside of the ribs.
The best magic of all is that the oven does the work. No standing over a blazingly hot grill on a hot day. Once the oven door closes, there is nothing to be done.
Walk into the kitchen and a savory-sweet aroma scents the air. Pull the baking tray out of the oven and press a finger against the outside of the rack. The soft pliancy of the meat has been replaced by a jerky-like crust as sweet as a crème brulee topping.

Slow-Roasted, Dry-Rubbed Pork Ribs
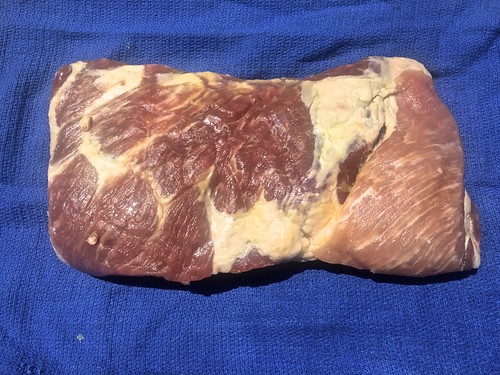
Rack of pork ribs, trimmed. Credit: Copyright 2016 David Latt
Cooking time depends on the size and thickness of the rack.
Buy good quality pork. Asian and Latin markets are often a reliable source of fresh pork products. Unlike the ribs sold in upscale supermarkets, the ribs in these markets will most likely be untrimmed.
Above the actual ribs, the rack will have a top portion with boneless flap meat and a section with thick bones similar to country style ribs.  Another smaller piece of flap meat will stretch across the back of the rib bones.
Requiring only a sharp filleting knife and a few minutes, removing the flap meat and the top portion is not difficult. The flap meat is excellent to use in stir fries, slow roasted in the oven or grilled on the BBQ.
A white membrane is attached to the outside of the flap meat. Use a sharp filleting knife to separate the meat from the membrane and discard.
The flap meat and country style bones can be prepared in the same manner as the ribs.  They will cook more quickly and should be removed from the 250 F oven after a total of 2 to 3 hours depending on thickness.
While the rack of ribs does not have to be turned over, the flap meat and country style bones should be turned over after one hour for even cooking. After another hour, use kitchen shears to cut off a small piece of meat to test for doneness. Return to the oven if the meat is not yet tender.
To eat the country style ribs, have a sharp paring knife handy to help cut out those hard to reach tasty bits tucked between the bones.
The ribs can be cooked ahead and reheated. In which case, do not cut apart the ribs until ready to serve. Reheat in a 300 F oven for 15 minutes.
Prep time: 30 minutes
Cooking time: 6 to 8 hours
Resting time: 5 minutes
Total time: 6 hours, 35 minutes to 8 hours, 35 minutes
Yield: 4 servings
Ingredients
1 rack pork ribs, 4 to 5 pounds, washed, dried
3 cups brown sugar
2 tablespoons kosher salt
2 tablespoons freshly ground black pepper
¼ cup cumin
¼ cup coriander
½ teaspoon cayenne (optional)
Directions
1. Place a wire rack in the middle of the oven. Preheat to 250 F.
2. Select a baking pan or cookie sheet that is 2 inches longer than the rack of ribs. Cover the pan with aluminum foil for easy clean up. Place a wire rack on top of the aluminum foil.
3. Lay the rack of ribs on a cutting board, bone side up. Use a sharp filleting knife to remove the tough membrane on the bone side of the rack. Let the knife help you lift the membrane. Use your fingers to pull the skin off the bones and discard.
4. Do not cut off any fat.
5. In a bowl, mix together dry ingredients.
6. For easy cleanup, lay a sheet of plastic wrap on the cutting board. Place the rack on the cutting board. Layer a thick coat of the dry spices onto both sides, covering the meat and bones.
7. Reserve left-over dry rub in an air tight container and refrigerate for later use.
8. Carefully place the rack of ribs on the wire rack meat side up.
9. Put the baking sheet into the preheated oven.
10. Roast six hours. Remove from oven. Use kitchen shears to cut off a small piece and taste.
11. The outside should have a jerky-crispness. The meat inside should be moist and tender. The tapered end of the rack where the bones are small will cook faster than the rest of the ribs. Use the kitchen shears to cut off that section before returning the rack to the oven for another one-two hours. Be careful not to dry out the meat.
12. Once the ribs are cooked, remove from oven and let the meat rest five minutes.
13. Cut between the rib bones and chop into pieces any flap meat without bones. Serve hot with a green salad, Cole slaw, baked beans or freshly steamed vegetables.

Monday, July 29, 2019

Hot Weather, Cool Kitchen - Pork Ribs Cooked Overnight & Watermelon Gazpacho

For the past several months where we live in Coastal Southern California, we have benefited from June-Gloom which stretched into July-Gloom. Overcast skies locked in cooler temperatures even as inland Los Angeles baked under an unrelenting sun.

But, now,  the hot weather finally embraced the Pacific Palisades where we live.  But, now worries, with temperatures reaching into the high-80s, it's time to cook up two favorite summertime recipes.

Low-temperature roasted pork ribs and watermelon gazpacho.

Dry Rub Pork Ribs, Cook Over-Night 

Dry rub pork ribs that we cook overnight in a low-temperature oven. We wake up in the morning to the beautiful aroma of pork cracklings. All the cooking happens during the night when we're asleep.

Easy-to-make dry rub pork ribs take only a few steps to prepare and a good night's sleep: 1) clean the ribs, 2) layer on dry rub, 3) put into a 250 F oven when you go to bed and 4) wake up, remove the ribs and enjoy!

Cooking with high heat is exciting. There is great pleasure in watching the pyrotechnics of an outdoor grill as sizzling fat catches fire.  Roasting at low heat in the oven lacks that excitement.
And yet, what happens in an oven set at 250 F has its own kind of magic. In the darkness of the oven, the waves of steady heat melt the fat inside the rack, tenderizing the meat and gently fusing the dry rub to the outside of the ribs.
The best magic of all is that the oven does the work. No standing over a blazingly hot grill on a hot day. Once the oven door closes, there is nothing to be done.
Walk into the kitchen and a savory-sweet aroma scents the air. Pull the baking tray out of the oven and press a finger against the outside of the rack. The soft pliancy of the meat has been replaced by a jerky-like crust as sweet as a crème brulee topping.

Slow-Roasted, Dry-Rubbed Pork Ribs

Rack of pork ribs, trimmed. Credit: Copyright 2016 David Latt
Cooking time depends on the size and thickness of the rack.
Buy good quality pork. Asian and Latin markets are often a reliable source of fresh pork products. Unlike the ribs sold in upscale supermarkets, the ribs in these markets will most likely be untrimmed.
Above the actual ribs, the rack will have a top portion with boneless flap meat and a section with thick bones similar to country style ribs.  Another smaller piece of flap meat will stretch across the back of the rib bones.
Requiring only a sharp filleting knife and a few minutes, removing the flap meat and the top portion is not difficult. The flap meat is excellent to use in stir fries, slow roasted in the oven or grilled on the BBQ.
A white membrane is attached to the outside of the flap meat. Use a sharp filleting knife to separate the meat from the membrane and discard.
The flap meat and country style bones can be prepared in the same manner as the ribs.  They will cook more quickly and should be removed from the 250 F oven after a total of 2 to 3 hours depending on thickness.
While the rack of ribs does not have to be turned over, the flap meat and country style bones should be turned over after one hour for even cooking. After another hour, use kitchen shears to cut off a small piece of meat to test for doneness. Return to the oven if the meat is not yet tender.
To eat the country style ribs, have a sharp paring knife handy to help cut out those hard to reach tasty bits tucked between the bones.
The ribs can be cooked ahead and reheated. In which case, do not cut apart the ribs until ready to serve. Reheat in a 300 F oven for 15 minutes.
Prep time: 30 minutes
Cooking time: 6 to 8 hours
Resting time: 5 minutes
Total time: 6 hours, 35 minutes to 8 hours, 35 minutes
Yield: 4 servings
Ingredients
1 rack pork ribs, 4 to 5 pounds, washed, dried
3 cups brown sugar
2 tablespoons kosher salt
2 tablespoons freshly ground black pepper
¼ cup cumin
¼ cup coriander
½ teaspoon cayenne (optional)
Directions
1. Place a wire rack in the middle of the oven. Preheat to 250 F.
2. Select a baking pan or cookie sheet that is 2 inches longer than the rack of ribs. Cover the pan with aluminum foil for easy clean up. Place a wire rack on top of the aluminum foil.
3. Lay the rack of ribs on a cutting board, bone side up. Use a sharp filleting knife to remove the tough membrane on the bone side of the rack. Let the knife help you lift the membrane. Use your fingers to pull the skin off the bones and discard.
4. Do not cut off any fat.
5. In a bowl, mix together dry ingredients.
6. For easy cleanup, lay a sheet of plastic wrap on the cutting board. Place the rack on the cutting board. Layer a thick coat of the dry spices onto both sides, covering the meat and bones.
7. Reserve left-over dry rub in an air tight container and refrigerate for later use.
8. Carefully place the rack of ribs on the wire rack meat side up.
9. Put the baking sheet into the preheated oven.
10. Roast six hours. Remove from oven. Use kitchen shears to cut off a small piece and taste.
11. The outside should have a jerky-crispness. The meat inside should be moist and tender. The tapered end of the rack where the bones are small will cook faster than the rest of the ribs. Use the kitchen shears to cut off that section before returning the rack to the oven for another one-two hours. Be careful not to dry out the meat.
12. Once the ribs are cooked, remove from oven and let the meat rest five minutes.
13. Cut between the rib bones and chop into pieces any flap meat without bones. Serve hot with a green salad, Cole slaw, baked beans or freshly steamed vegetables.

Gazpacho Takes on a Sweet Partner

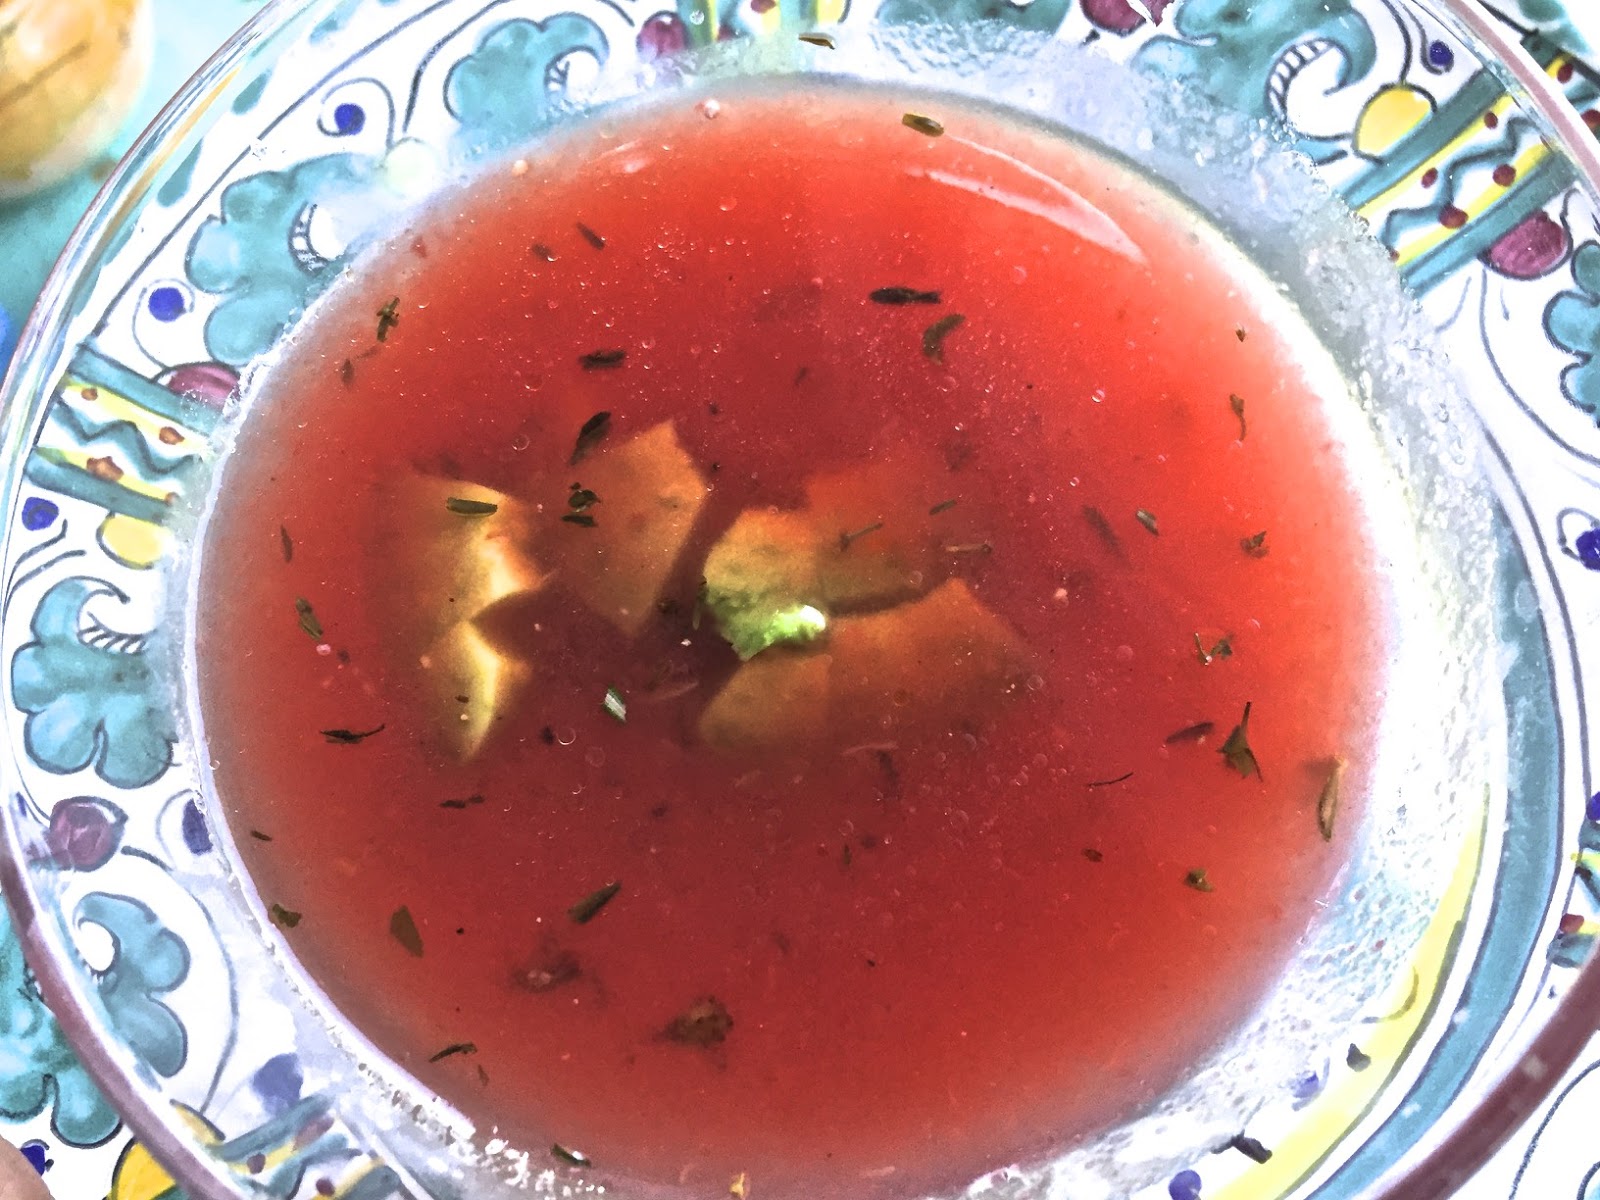
My second favorite is a riff on gazpacho. We use a mix of watermelon and tomato juice to add lightness and sweetness and create a perfect summer afternoon cocktail.

For tomatoes, we go to our favorite farmers market. Ever since it opened, the Pacific Palisades farmers market has been as much a part of our Sundays as the New York Times. Right now, an abundant crop of tomatoes means the price is right to buy all we want.


I learned to appreciate this hybrid-gazpacho on a trip to Switzerland. In Zurich I had a tasting at Rive Gauche, the casual dining cafe at the historic and beautiful Baur au Lac Hotel close to Lake Zurich.

I stayed at the hotel to write a profile for Luxury Travel Magazine. I was eating at Rive Gauche because I was going to do a video cooking demonstration with the chef, Olivier Rais, a delightful, talented chef who is passionate about cooking.


One of the dishes he wanted me to enjoy was his version of gazpacho, one that added watermelon juice to soften the acidity of the ripe uncooked tomato juice that is the basis of traditional gazpacho. I have certainly seen this hybrid dish before.


But I was particularly taken with chef Rais' version, a clarified liquid served in a glass. All the vegetable bits had been strained out with the result that the gazpacho became an exceptionally refreshing, summer beverage.

When I interviewed chef Rais, he had recently returned from Los Angeles where he spent time at Crossroads Kitchen, a well-regarded vegan restaurant, owned by Tal Ronnen.


Invited to a tasting dinner at Crossroads Kitchen, I had an opportunity to enjoy chef Ronnen's version of the watermelon gazpacho. Similar in flavors but different, chef Ronnen did not filter out the vegetable bits, giving his gazpacho a deliciously rustic taste.


For my version, I split the difference between the two chefs. I strained the tomato pulp but retained some of the texture.

I hope you have the opportunity to visit Rive Gauche in Zurich and Crossroads Kitchen in Los Angeles to taste and compare their gazpachos. In the meantime, please try this very easy-to-make recipe.

Watermelon Gazpacho


Ripe tomatoes and a ripe watermelon are essential. Both should be sweet and full of juice.

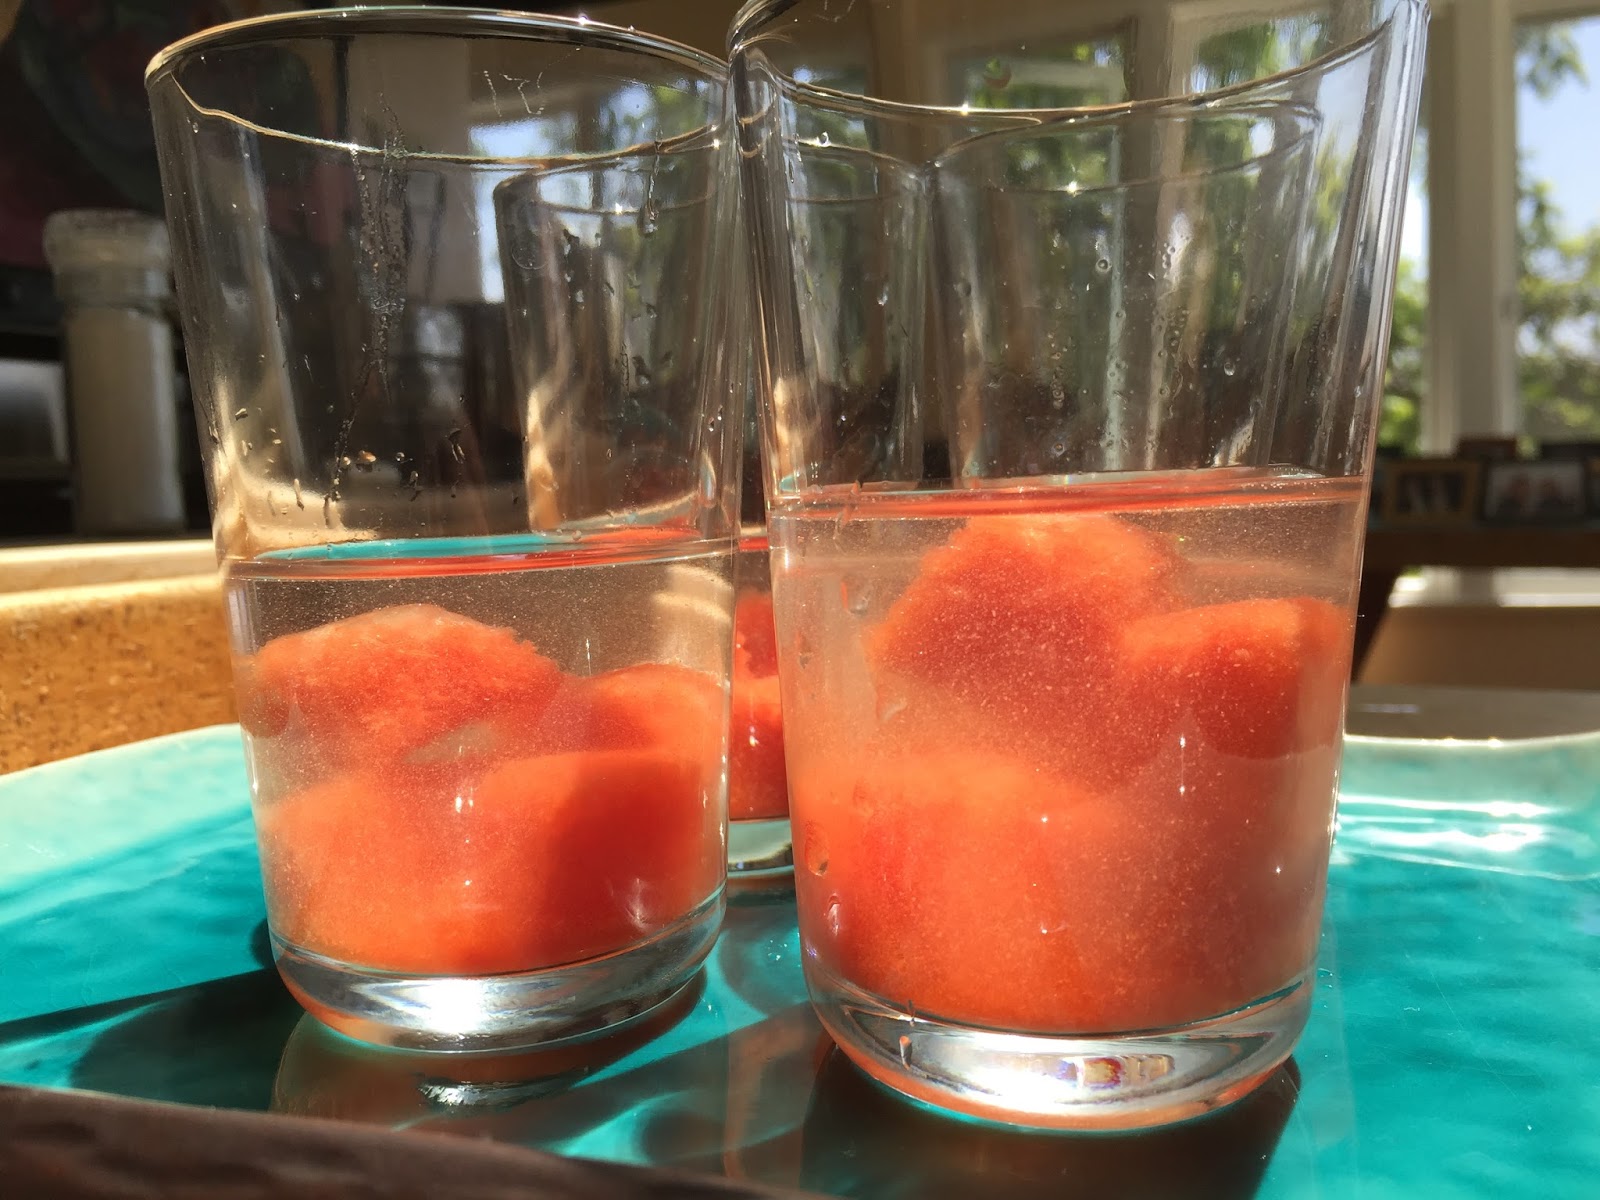
If any watermelon juice is left over, make watermelon ice by gently heating the juice and reducing the liquid by a quarter. Cool, then pour into ice cube trays or a freezer-proof container. Freeze and use to sweeten vodka cocktails or lemonade. As the ice cubes melt, sweet watermelon juice releases into the drink. Delicious!


Serves 4-6

Total time to prepare: 20 minutes

Ingredients

2 pounds ripe tomatoes, washed, stems removed
2 pounds ripe watermelon, washed
1 ripe avocado
1 cup homemade croutons
1 ripe avocado, washed
5 dried bay leaves
1/4 teaspoon black peppercorns
1/4 teaspoon dried oregano
1/4 teaspoon dried thyme
Pinch cayenne
Sea salt to taste

Directions

Place a box grater over a non-reactive bowl. Grate the tomatoes and collect all the juice. Or, run the chopped tomatoes through a food mill and collect the juice. Scrape the pulp off the underside of the food mill sieve and add to the juice. Pour into a large container.

Add the dried spices to the tomato juice. Cover and refrigerate at least one hour or overnight.

Use a sharp knife to cut off the watermelon rind. Press the flesh through a fine mesh sieve or through a food mill and collect all the juice. Pour into a large container and refrigerate.


Just before serving, peel the avocado, remove the pit and chop into dime-sized pieces. Pour the tomato juice through a sieve to remove the dried spices.


Combine equal amounts of seasoned tomato juice and watermelon juice and mix well.

Pour gazpacho into bowls or cups. Top with avocado and croutons. Serve chilled.

Sunday, May 28, 2017

Sweet, Crispy Pork Ribs; Cooked Low And Slow


The summertime debate is on. What is the easiest way to cook pork ribs? Boil, roast or grill? High heat, low heat, wet sauce or dry rub? I’ve tried them all. Now the question is settled, at least for me.  Slow roasting with a dry rub. To avoid summer’s heat, I put the ribs in a 250 F oven before I go to bed. When I wake up, the ribs are moist with a bacon-thin, sweetened crust. And these best-ever ribs cooked while I was fast asleep.
My mother taught me to make pork ribs with a thick coating of sauce sweetened with brown sugar and raisins. Eating those finger-licking ribs was one of my favorite childhood memories.
Everything changed on a busy research trip to Abilene and Fort Worth, when I ate at 25 restaurants in 36 hours. I fell in love with West Texas BBQ.
At restaurant after restaurant, I watched grill masters lay bundles of mesquite into their subcompact-car-sized smokers. With the heavy metal doors open, the wood crackled as flames enveloped the logs The grill masters seasoned their racks of pork ribs with thick, grainy coats of brown sugar and spices rubbed onto the meat.  Waves of dry heat radiated from the smokers. But the heat that would cook these ribs would come not from an open fire but from smoldering mesquite embers.
When the doors were closed, the blazing logs were starved of oxygen. The flames died and a delicate smoke filled the air. At that moment the grill masters loaded in the racks of ribs coated with sweetened dry rub. Hours later, the ribs were removed, their outer coating thickened to crispness, creating what grill masters call “bark.”
I loved those ribs even more than the ones from my childhood.
At home, without the benefit of a smoker, I experimented for years to duplicate that sweet-crispness. Nothing could ever recreate the wonderful mesquite smokiness but I did succeed in making ribs with bark as good as any I enjoyed in West Texas.

High heat versus slow cookingMix of kosher salt, black pepper, brown sugar, cumin, coriander and cayenne for dry rub slow roasted pork ribs. Credit: Copyright 2016 David Latt

Mix of kosher salt, black pepper, brown sugar, cumin, coriander and cayenne for dry rub slow roasted pork ribs. Credit: Copyright 2016 David Latt

Cooking with high heat is exciting. There is great pleasure in watching the pyrotechnics of an outdoor grill as sizzling fat catches fire.  Roasting at low heat in the oven lacks that excitement.
And yet, what happens in an oven set at 250 F has its own kind of magic. In the darkness of the oven, the waves of steady heat melt the fat inside the rack, tenderizing the meat and gently fusing the dry rub to the outside of the ribs.
The best magic of all is that the oven does the work. No standing over a blazingly hot grill on a hot day. Once the oven door closes, there is nothing to be done.
Walk into the kitchen and a savory-sweet aroma scents the air. Pull the baking tray out of the oven and press a finger against the outside of the rack. The soft pliancy of the meat has been replaced by a jerky-like crust as sweet as a crème brulee topping.

Slow-Roasted, Dry-Rubbed Pork Ribs

Rack of pork ribs, trimmed. Credit: Copyright 2016 David Latt
Cooking time depends on the size and thickness of the rack.
Buy good quality pork. Asian and Latin markets are often a reliable source of fresh pork products. Unlike the ribs sold in upscale supermarkets, the ribs in these markets will most likely be untrimmed.
Above the actual ribs, the rack will have a top portion with boneless flap meat and a section with thick bones similar to country style ribs.  Another smaller piece of flap meat will stretch across the back of the rib bones.
Requiring only a sharp filleting knife and a few minutes, removing the flap meat and the top portion is not difficult. The flap meat is excellent to use in stir fries, slow roasted in the oven or grilled on the BBQ.
A white membrane is attached to the outside of the flap meat. Use a sharp filleting knife to separate the meat from the membrane and discard.
The flap meat and country style bones can be prepared in the same manner as the ribs.  They will cook more quickly and should be removed from the 250 F oven after a total of 2 to 3 hours depending on thickness.
While the rack of ribs does not have to be turned over, the flap meat and country style bones should be turned over after one hour for even cooking. After another hour, use kitchen shears to cut off a small piece of meat to test for doneness. Return to the oven if the meat is not yet tender.
To eat the country style ribs, have a sharp paring knife handy to help cut out those hard to reach tasty bits tucked between the bones.
The ribs can be cooked ahead and reheated. In which case, do not cut apart the ribs until ready to serve. Reheat in a 300 F oven for 15 minutes.
Prep time: 30 minutes
Cooking time: 6 to 8 hours
Resting time: 5 minutes
Total time: 6 hours, 35 minutes to 8 hours, 35 minutes
Yield: 4 servings
Ingredients
1 rack pork ribs, 4 to 5 pounds, washed, dried
3 cups brown sugar
2 tablespoons kosher salt
2 tablespoons freshly ground black pepper
¼ cup cumin
¼ cup coriander
½ teaspoon cayenne (optional)
Directions
1. Place a wire rack in the middle of the oven. Preheat to 250 F.
2. Select a baking pan or cookie sheet that is 2 inches longer than the rack of ribs. Cover the pan with aluminum foil for easy clean up. Place a wire rack on top of the aluminum foil.
3. Lay the rack of ribs on a cutting board, bone side up. Use a sharp filleting knife to remove the tough membrane on the bone side of the rack. Let the knife help you lift the membrane. Use your fingers to pull the skin off the bones and discard.
4. Do not cut off any fat.
5. In a bowl, mix together dry ingredients.
6. For easy cleanup, lay a sheet of plastic wrap on the cutting board. Place the rack on the cutting board. Layer a thick coat of the dry spices onto both sides, covering the meat and bones.
7. Reserve left-over dry rub in an air tight container and refrigerate for later use.
8. Carefully place the rack of ribs on the wire rack meat side up.
9. Put the baking sheet into the preheated oven.
10. Roast six hours. Remove from oven. Use kitchen shears to cut off a small piece and taste.
11. The outside should have a jerky-crispness. The meat inside should be moist and tender. The tapered end of the rack where the bones are small will cook faster than the rest of the ribs. Use the kitchen shears to cut off that section before returning the rack to the oven for another one-two hours. Be careful not to dry out the meat.
12. Once the ribs are cooked, remove from oven and let the meat rest five minutes.
13. Cut between the rib bones and chop into pieces any flap meat without bones. Serve hot with a green salad, Cole slaw, baked beans or freshly steamed vegetables.
Main photo: Dry rub pork ribs cut apart after slow roasting and ready for serving. Credit: Copyright 2016 David Latt.
  

Wednesday, May 25, 2011

To Grill or Not to Grill, or Is It Better to Make Spaghetti?

As Memorial Day approaches, I clean the grill.

Remembering the heady fragrance of grilling ribeye steaks, chicken, lobster, shrimp and baby octopus energizes me as I brush away the leaves and dust that have gathered on the cover. With happy memories of grilled artichokes, carrots, broccoli and shiitake mushrooms, I sweep away cobwebs that have gathered in the briquets.

But I know that once I have reconnected with the grill, I will find it difficult to stand in front of the stove and labor indoors.

So before I give myself over to the sweet slavery of grilling, I'll make a farewell dinner of spaghetti and garlic shrimp.

Spaghetti and Shrimp

Yield: 4 servings

Time: 30 minutes

Ingredients

1 pound shrimp, washed, shelled and deveined
1 pound spaghetti
2 cloves garlic, peeled, finely chopped
2 tablespoons yellow onion, peeled, finely chopped
1/4 cup Italian parsley, washed, dried, leaves only, finely chopped
3 tablespoon sweet butter
2 tablespoons olive oil
1 teaspoon Kosher salt
1 cup pasta water
Sea salt and black pepper to taste
1/2 cup freshly grated Parmesan

Instructions

To help with timing the dish, make the pasta first.

Bring a galon of water to boil in a large stock pot. Add the kosher salt and the pasta. Every five minutes use tongs to stir the pasta to keep it separated. Place a strainer in the sink along with a heat-proof cup to capture 1 cup of pasta water. In ten minutes or until the pasta is al dente (firm to the bite), strain the pasta and reserve the cup of pasta water.

Return to the pasta to the still hot pot. Add 1 tablespoon sweet butter and 1 teaspoon olive oil, season with 1/4 teaspoon each freshly ground black pepper and sea salt. Stir well with tongs. Lay a piece of aluminum foil over the top of the pot to help the pasta retain heat.

In a large chefs pan, heat 1 tablespoon olive oil and saute the shrimp until lightly pink. Remove the cooked shrimp from the pan. Add the garlic, onion and parsley and saute over a medium flame until lightly browned. Stir well to prevent burning. Add 2 tablespoons sweet butter and 2 teaspoons olive oil. Heat and add 1/2 cup pasta water.

Simmer and taste. Add sea salt and pepper as needed.

Add the cooked pasta and shrimp. Stir well to coat with the sauce. Add small amounts of pasta water as needed.  Toss well and serve with grated Parmesan.

Variations

Sprinkle 1/4 cup toasted bread crumbs on the pasta before adding the grated cheese.

Toss the pasta with 2 tablespoons finely chopped, crisp bacon.

Add 1/4 teaspoon pepper flakes for heat.

Saute 4 shiitake mushrooms, washed, thinly sliced with the garlic, onions and parsley.

Saute 1 cup corn kernels with the garlic, onions and parsley.

Instead of shrimp, use lobster or scallops.

Saturday, May 31, 2008

Pork and Beans: A Childhood Favorite Gets an Upgrade

When I was a kid one of my favorite things to eat was hot dogs and beans. I was really happy when I saw my mother opening a can of Campbell's Pork and Beans, cutting up an Oscar Meyer hot dog and cooking them together until they were pipping hot. Yum.

When I was hungry and no one was home, I'd make a hot dog and beans sandwich with buttered bread. Hot or cold didn't matter, the beans were delicious either way.

But like peanut butter and jelly sandwiches, I hadn't eaten hot dogs and beans since I was a kid. Last week I happened to be in the supermarket shopping for a Memorial Day dinner. I saw that Bush's Baked Beans were on sale.

If you haven't had Bush's, you're in for a treat. These are the best canned baked beans ever. Since I was making spareribs, the idea of baked beans seemed a good fit. But while I had fond memories about pork and beans, I wasn't going to use hot dogs. My adult taste buds needed ingredients with a lot more flavor.

Bush's Baked Beans with Italian Sausages

Yield 4 servings
Time 20 minutes

Ingredients

1 28 ounce can Bush's Baked Beans
2 Italian sausages (mild or hot)
1 small onion (peeled, finely chopped)
2 garlic cloves (peeled, finely chopped)
1/4 cup Italian parsley leaves, washed, finely chopped
Olive oil
Freshly ground pepper

Method

Grill the sausages until brown on all sides. Let cool, then slice into 1/4" rounds. Sauté the onions, garlic, and parsley with olive oil in a small pot until lightly browned. Season with pepper. Add the sausage rounds and baked beans. Stir frequently and simmer for 15 minutes.

Variations

Sprinkle grated cheddar cheese on top.

Add red peppers.

Add spinach to the sauté.