Monday, April 28, 2008

It's 90 Degrees in the Shade But a Tall Glass of Ice Cold Lemonade Lowers the Temperature

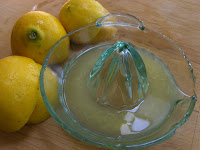
It's hot. Really hot. But Nature is good to us. When the temperature climbs there's an abundance of produce to help cool us down. Salads. Fresh fruit. And lemonade. At the Palisades Farmers' Market on Sunday the roses were in bloom, berries (strawberries, raspberries, blackberries) were everywhere, and Meyer lemons were selling 5 for a dollar. At that price we can afford to have as much fresh lemonade as we can drink. I don't know anything more refreshing on a hot day than an ice cold glass of lemonade.

A little bit of lemon juice goes a long way. When lemons are in season, it's difficult to understand why we'd ever buy lemonade from the supermarket. If Meyer lemons are available, they make a mellow-tasting lemonade. Artificial sweeteners can be used to replace the sugar. Personally I prefer using raw sugar because of its caramel flavor.

Fresh Lemonade

Making lemonade is easy. The hardest part is juicing the lemons and that takes very little effort. An electric juicer can be used although I enjoy doing it by hand.

1/2 cup fresh lemon juice (3-4 large lemons)
1/4 cup sugar (preferably raw sugar)
1 quart water

In a quart pitcher mix the juice, sugar, and water together with a long spoon. Adjust the flavors to your taste by adding more lemon juice and/or sugar. The lemonade will keep in the refrigerator for several days. Stir before serving. Find a tall glass and fill it with ice. For a garnish you can use a lemon wedge, a sprig of mint, or a slice of mango.

Variations

Crush an herb like mint or rosemary and add it to the lemonade.

Mix in the juice of 2 limes to make lemon-limeade.

Add 1 1/2 ounces of white rum or vodka to each tall glass with a sprig of mint to serve at a cocktail party.

Serves 4. Preparation Time: 5 minutes.

Saturday, April 26, 2008

Omelets Strike the Right Note at Breakfast

Breakfast is all-important. We need to be energized to take on the world but all too often we have the same meal, day in and day out. Bacon and eggs. Waffles with syrup. Cereal. Toast. A bowl of fruit. Power shakes. What started out as stimulating gets tedious.

Because they're so versatile, omelets are an antidote to breakfast-boredom. Just about any favorite herb, spice, vegetable, meat, or cheese works well with eggs. The only limitations are what you like.

(All the recipes are for 2 omelets.)

Cheese Omelet

The cheese omelet sets the stage for more ambitious fillings.

4 eggs (or 8 egg whites)
1 teaspoon butter
1 tablespoon half and half, whole milk, or low fat milk
2 tablespoons cheese (cheddar, brie, Swiss, Parmesan), grated or finely chopped
2 shallots, peeled, finely chopped
2 tablespoons Italian parsley (or basil, tarragon, oregano), washed, stems removed, leaves whole or roughly chopped
Olive oil
Sea salt and pepper

There are 2 essentials to making a good omelet: fresh eggs (ideally, Farmers' Market fresh) and a non-stick pan. The risks associated with Teflon are minimized if low heat is used and you avoid scratching the surfaces by using a rubber spatula.

The starting point for an omelet is to sauté the fillings. Too often in restaurants vegetables with high water content aren't cooked with a watery result. Sauté the shallots and parsley with the olive oil over a medium flame until lightly browned. Remove and set aside.

To make 2 individual omelets use an 8"-10" non-stick skillet. Even though I use a non-stick pan, I add a pat of butter for flavor. For an Italian touch drizzle a bit of olive oil. For low cal versions use egg whites, skim milk and low fat cheeses.

Melt the butter over a medium-low flame. Beat the eggs (or egg whites) together with the milk and pour into the pan. Cook a few minutes until the egg has set on the pan side. Spread the shallot-parsley sauté over half of the omelet. Add the cheese. Using a rubber spatula fold the "empty" side of the omelet onto the side with the sauté. Cook another 2 minutes then slide onto a plate. Season with sea salt and pepper to taste.

As they do in all good restaurants, offer yourself a choice of hash browns, fresh fruit, sausages or bacon, toast, or orange juice to go with your omelet.

Preparation Time: 5 minutes. Cooking Time: 10 minutes.

Bacon and Cheese Omelet

Using the basic recipe, start to build up the layers of flavor by adding bacon (or another salty meat like sausage or ham).

4 eggs (or 8 egg whites)
1 teaspoon butter
1 tablespoon half and half, whole milk, or low fat milk
Olive oil
2 tablespoons cheese (cheddar, brie, Swiss, Parmesan)
2 shallots, peeled, finely chopped
2 tablespoons Italian parsley, washed, stems removed, leaves whole or roughly chopped
2 tablespoons cooked bacon (or sausage or ham) crumbled
Sea salt and pepper

Use the Cheese Omelet directions above, adding the cooked meat at the same time as the cheese. Season with sea salt and pepper to taste.

Preparation Time: 10 minutes. Cooking Time: 10 minutes.

Vegetable Omelet

Instead of using meat to add flavor, use vegetables. Just about any vegetable will work: spinach, zucchini, onions, carrots, kale, artichoke hearts, broccoli, asparagus, English peas, potatoes... Walk down the aisles of your local farmers' market and think "omelet" as you pass the row after row of fresh vegetables.

Sauté the vegetables for sweetness and the added flavor of caramelization but they can be steamed. Tomatoes can be used sautéed or fresh, although I prefer fresh.

The amount of vegetables you use depends on their final volume. 1 cup of uncooked spinach will yield 1/4 cup of cooked spinach. 1 cup of zucchini will yield 3/4 cup for the filling. If you like a thin omelet, 1/4 cup of sautéed filling per omelet is probably sufficient. For a plump omelet, 1/2 cup per omelet is probably more to your liking.

Sauté the vegetables with olive oil, garlic, shallots, and parsley until softened or lightly browned then set aside. Follow the Cheese Omelet directions above for technique. Season with sea salt and pepper to taste.

Preparation Time: 10 minutes. Cooking Time: 10 minutes.

Chicken Livers Omelet

I love chicken livers but they aren't everyone's cup of tea (certainly not my wife's). If you do like them, you'll really enjoy this recipe.

4 eggs (or 8 egg whites)
1 teaspoon butter
1 tablespoon half and half, whole milk, or low fat milk
Olive oil
2 tablespoons cheese (cheddar, brie, Swiss, Parmesan)
4 shallots, peeled, finely chopped
2 tablespoons Italian parsley, washed, stems removed, leaves whole or roughly chopped
2 cloves garlic, peeled, finely chopped
2 mushrooms (brown or shiitake), washed, julienned
2 chicken livers, washed, cut into nickel-size pieces
Sea salt and pepper
Cayenne (optional)

Sauté the shallots (I doubled the amount of shallots for this recipe because their sweetness goes well with the livers), garlic, parsley, and mushrooms until lightly browned. Add the chicken livers and brown on all sides being careful to keep the insides pink. Season with sea salt, pepper, and cayenne (if you want some heat). Remove from the burner and set aside.

Make the omelet as described above, place the chicken liver sauté on one half and turn the "empty" side onto the side with the sauté. Let cook for 2 minutes and serve.

Preparation Time: 10 minutes. Cooking Time: 10 minutes.

Wednesday, April 23, 2008

Udon Finds the Perfect Partners: Clams, Mushrooms, and Garlic

These days udon is almost as ubiquitous as ramen. Served in a hot bowl of fragrant soup, udon satisfies as much with its texture as its flavor. Fat and chewy, the soft noodles are as comforting as dumplings.

Recently we visited Musha, a Tokyo style Izakaya restaurant (424 Wilshire Boulevard in downtown Santa Monica, 310/576-6330). Serving drinks and Japanese tapas--meats grilled at the table on charcoal braziers, sushi, noodles, and soups--the restaurant serves a delicious example of fusion cuisine: Udon Vongole. Using a European approach, the salty clam broth is sweetened with slices of garlic and handfuls of mushrooms.

Since Carlsbad Aquafarm had more of their delicious clams at the Santa Monica Farmers' Market, tonight seemed like the perfect time to make the dish at home.

Udon with Clams, Mushrooms, and Garlic


Fresh udon is sold in Asian markets like Nijiya Markets and even some supermarkets. Following Musha's example I used several varieties of mushrooms. The different textures and flavors added to the pleasures of the dish.

Yield: 2 servings

Time: 30 minutes

Ingredients

2 packages fresh udon
2 pounds live clams, washed
6 cloves garlic, peeled, sliced thin
2 large shallots, peeled, sliced thin
1 tablespoon sweet butter
1 pound mushrooms (shiitake, brown, King trumpet, oyster mushrooms), washed, dried, cut in half
1 tablespoon cilantro leaves, washed, stems removed
Olive oil
Pepper

Method

Steam the clams in 1/2 cup water in a covered pot for 3 minutes. Set aside to cool. Remove the clams from their shells. Pour the broth into a bowl, being careful to discard any grit. You should have 1 1/2 cups of broth.

Sauté the garlic, shallots, and mushrooms with the olive oil until lightly browned. Add the clam broth and butter. Simmer 15 minutes. Season with pepper but don't add salt since the clam broth is salty.

Boil a quart of water. Add the packages of udon. The boiling water will soften the udon in 2-3 minutes. Drain the udon and add to the mushrooms and garlic and stir.

Taste the broth. If it's too salty, add a bit more butter. Add the clams at the last minute so they don't over cook. Serve in deep bowls and top with the cilantro leaves.

Tuesday, April 22, 2008

Surprise Surprise, What You Can Find When You Clean Out the Refrigerator

Over the years we've accumulated several refrigerators: 1 in the kitchen, 2 in the garage. But even with 3 refrigerators, there are times when they're so crowded we can't tell what's in there. That's when I have to take the time and give the refrigerators a good spring cleaning. Anything past its expiration date is an easy-throw-away. But what about the half-dozen bbq sauces the boys and I are still experimenting with?

Sometimes there's a pleasant surprise in the back of the refrigerator, like the home cured olives that get better with time. Or a month old paper bag filled with what was two pounds of shiitake mushrooms. Whenever I go to the Vietnamese markets in Little Saigon, I buy 4-5 pounds of shiitakes because they're so inexpensive: $2.79/pound instead of the usual $12-18.00/pound at Whole Foods and Gelson's. For weeks we'll feast on shiitakes: in pastas, grilled on the bbq, in soups, and sautéed with garlic and shallots.

Everyone knows that mushrooms should only be stored in paper bags because in plastic they'll get soggy. An added advantage: the paper bag is a natural dehydrator. In a few weeks the shiitakes dry out perfectly. This technique works with brown mushrooms as well but the shiitakes are the best.

Dehydrating Shiitakes

Put the mushrooms into a paper bag, add a paper towel in the middle to prevent against spoilage and facilitate drying, and close the bag. If any mushrooms develop mold, discard them. Once the shiitakes are completely dried, store in a sealed glass jar. At that point they don't have to be kept in the refrigerator but they seem to taste better if you do.

Reconstituting Dried Shiitakes

Put the dried mushrooms in a heat proof bowl and pour in enough boiling water to cover. Place a smaller bowl on top of the mushrooms to push them under the hot water. Let them sit for 30 minutes until they soften. Just before using, remove the mushrooms, gently squeeze out the water (reserve all the water), cut off the stems and discard. At this point the mushroom caps can be cooked as if they were fresh.

Shiitake Mushroom Soup with Garlic

A simple, satisfying soup. Other ingredients can be added to the basic soup: grilled sausages, roast chicken, raw shrimp, carrot rounds, corn kernels, , ginger, or deveined shrimp. If you have a package of ramen, cook the noodles and add those and a sliced hard boiled egg as well.

2 cups dried shiitake mushrooms, reconstituted, stems removed, thinly sliced
4 cloves garlic, peeled, finely chopped
4 shallots, peeled, finely chopped
4 cups spinach leaves, washed, stems removed (finely chop the stems, leave the leaves whole)
4 cups chicken stock (preferably homemade)
Soaking water
Sea salt and pepper
Olive oil

In a small pot sauté the mushrooms, garlic, shallots, spinach stems and leaves, and any other vegetables with the olive oil until lightly browned. Add the soaking water and chicken stock. Simmer for 20 minutes. Taste and adjust the seasoning with the salt and pepper as needed. If you cooked ramen noodles, add them just before serving.

Serves 2. Preparation Time: 10 minutes. Cooking Time: 30 minutes.

Friday, April 18, 2008

The Perfect Passover Dessert

Pulling together any dinner can be a challenge but Passover adds special obstacles. Besides preparing the dinner, there are the accoutrements for the service (the lamb shank, parsley, hard boiled egg, fresh horseradish etc) and making sure there are copies of the Passover service--the Haggadah--in the house. Since flour and cream can’t be used on Passover, favorite desserts can’t be called on. Dessert still needs to feels like a treat. At a time like this the simplest dessert--baked plums--satisfies completely.

I've posted this recipe before but it's worth repeating. Not in season from local providers, plums can be found in most markets. They can be served by themselves (they’re really that delicious), with freshly made whipped cream, or ice cream. An added benefit: they look good on the plate.

Baked Plums

4 ripe plums, washed, dried
1 teaspoon raw sugar

Heat the oven to 350 degrees. Quarter the plums, cutting out the little stem part and discarding the pit. Lay the sections on a silpat sheet or piece of tin foil on a baking sheet. Sprinkle with raw sugar. Bake for 30-45 minutes. The time is variable depending on how done you like the plums and how ripe they are. Serve warm.

Serves 4.

Preparation Time: 5 minues. Cooking Time: 30-45 minutes.

Thursday, April 17, 2008

Travel Makes Me Hungry

As the excellent magazine Saveur has proved, food and travel go together. When I'm traveling, I'll try out new restaurants and go to local markets as much as I'll visit historical sites and museums. Seeing what people eat and how they shop reveals as much about their world as their history and art.

But travel these days often means BYO because if you don't, you'll go hungry. Last month I talked about bringing food with you when you travel.

A good friend and well-known travel writer, Peter Greenberg, invited me to contribute some thoughts about food and travel. With generous help from Sarika Chawla who runs the site for Peter, the result is up now: A Food Lovers Five Easy Travel Tips. Take a look and let me know what you think. Peter's site is a must if you do any traveling.

Tuesday, April 15, 2008

Passing the Baton from Father to Sons

For my birthday my sons, Frank and Michael, paid me the best compliment: they wrote a remembrance of my cooking. As a dad I can honestly say that being appreciated is a great gift, worth all the blood, sweat and tears of parenting. For Michelle's birthday, they took their remembrance one step further: they cooked her a beautiful, multi-coursed dinner (I was happily included).

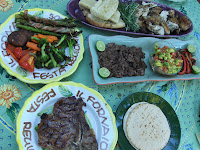
The quality of the food was impressive. So too were their organizational skills. Intuitively they knew that they had to divide up the work. In short order, they brought out starters: a selection of Italian cheeses, roasted red peppers, olives, grilled chicken wings, and bacon wrapped asparagus, mushrooms, and shrimp. Finished in the kitchen, they came out carrying platters of rosemary chicken, steak, carne asada, salsa, and a fresh fruit salad. "A Mexi-Italian feast," Michael called it.

As parents it's natural to worry about your kids. Will they achieve their goals, will they be happy, will they be safe? We also wonder if values we cherish will be as important to them. As Michael asked me, reacting to our oohs and aahs, "Aren't you glad you taught us how to cook?" Yes. Without a doubt.

Bacon Wrapped Appetizers

Simple and easy to make, the appetizers can be baked or grilled on the bbq.

12 asparagus, washed, white part trimmed off
12 pieces of bacon, cut into thirds
6 brown or shiitake mushrooms, washed, dried, cut in half
12 shrimp, washed, shelled, deveined
2 tablespoons olive oil
Sea salt and black pepper
Toothpicks

Toss the asparagus, mushrooms, and shrimp in a mixing bowl with the olive oil seasoned with sea salt and freshly ground black pepper. Wrap a piece of bacon around each, secured with a toothpick. Grill or bake in a 350 degree oven for about 5 minutes on each side. When the bacon crisps, the appetizers are ready to serve.

Serves 4. Preparation Time: 20 minutes. Cooking Time: 15 minutes.

Sunday, April 13, 2008

With a Little Help from a Friend I Discovered Guidi Marcello's deli

Cooking is one of life's great pleasures. But routine can be its enemy. Always using the same recipes, the same ingredients, or shopping at the same markets will wear down even the most foodie of cooks. I'm very grateful when someone puts me onto a new direction that reinvigorates my cooking. My good friend, Alexandra, an expert in all things Italian, did just that when she told me about the wholesale/retail importer Guidi Marcello (1649 10th Street, Santa Monica, CA 90404, 310/452-6277). The outside of the building is so nondescript I didn't find it at first. Inside is one of the best selections of affordable Italian imports in Los Angeles: cheeses (cow, sheep, goat), olives, cured meats, frozen desserts, pastas, olive oils, ceramics, breads, spices, chocolates...

There are so many great ingredients to try it's difficult to know where to begin. I started with the olives because I seem to be stuck in a routine of buying oil cured black and cracked green olives at Iranian markets. Guidi Marcello has rows of olives I hadn't seen before. One in particular looked intriguing: Castelvetrano green olives. Grown in Sicily, the olives are packed green and brine cured. The buttery flavor is quite surprising and delicious. Using them in a simple salad shows off their qualities.

Mozzarella Salad with Green Olives, Avocado, and Reduced Balsamic Dressing

For the dressing I like a simple mix of extra virgin olive oil and reduced balsamic vinegar, seasoned with sea salt and black pepper. I've talked about making balsamic vinegar reduction in quantity but for one salad just reduce 4 tablespoons of vinegar to 1 on a low flame in a sauce pan. The vinegar turns sweet. Let it cool and drizzle it over the salad with the olive oil. You can buy the fresh mozzarella at Guidi's or around the corner at Bay Cities Deli where they also carry the extraordinary Felino salami.

2 large fresh Mozzarella pieces, dried, cut into 1" squares
1 small ripe avocado, peeled, cut up
15 green olives (Castelvetrano or any other good quality olive), pitted, quartered
6 slices salami (Felino or any other good quality salami), casing removed, julienned
2 tablespoons extra virgin olive oil
1 tablespoon reduced balsamic vinegar
Sea salt and pepper

Combine all the salad ingredients in a large bowl, drizzle with the olive oil and reduced balsamic vinegar, and season with sea salt and freshly ground black pepper. Toss. Serve with a fresh baguette and sweet butter.

Serves 2. Preparation Time: 10 minutes.

Saturday, April 12, 2008

End of the Season Black Kale with Pasta

On Bitten I have a posting Last of the Winter Pastas featuring a favorite recipe: Pasta with Black Kale, Italian Sausage, and Shiitake Mushrooms. Of all the varieties of kale, black kale is a favorite because of the leaves' texture and sweetness. Kale likes cool weather so as the temperatures rise it will disappear but right now the farmers' markets have a good supply at reasonable prices.

Tuesday, April 8, 2008

See Pasta Run

It's been a long day. All you want to do is get home but traffic is terrible. Finally you're home, ready for dinner. You thought about stopping for take out or picking up something from the prepared food section at Whole Foods but you didn't want to be around people. What you needed was to take off your clothes, slip into your PJs, sit in front of the TV, and watch the Daily Show and then Colbert. Now all you have to do is deal with the fact that you're starving.

You open the refrigerator and stare at a chaos of jars, bottles, and plastic bags. The only thing that looks immediately edible is a week old bagel. You could slather on some butter and call it a night but that would be depressing. The magnetic sticker on the refrigerator has Domino's phone number. A large pizza with pepperoni is a phone call away. And then you have an epiphany--untold generations of Italians are sending psychic waves through the ether--Eat Pasta.

Pasta cooks in 10 minutes, the sauce, in another 10, make a salad and in 30 minutes you can be eating a meal that's reviving, healthy, and inexpensive. A basic sauce has only a few ingredients: olive oil, garlic, onions, sea salt, pepper, and cheese. Add chicken and broccoli. Or, shrimp and spinach. Black kale, bacon, and leeks. Roasted tomatoes and meatballs. Pasta is infinitely variable.

For dinner tonight we had fusilli with Italian sausages, garlic, onions, mushrooms, and red peppers. Very basic, very delicious.

Fusilli with Sausages and Red Peppers

The vegetarian version leaves out the sausages and chicken stock. Grilling or sautéing the sausages puts a crust on the outside. The red pepper can be raw or grilled. For the sauce, chicken stock works well but pasta water is good too.

Yield: serves 4
Time: 30 minutes

Ingredients

1 box De Cecco fusilli
2 tablespoons kosher salt
1 tablespoon sweet butter
2 garlic cloves, peeled, finely chopped
1/2 yellow onion, peeled, finely chopped
6 mushrooms, brown or shiitake, washed, dried, thin sliced
1/4 cup finely chopped red pepper, raw or grilled
2 Italian sausages, washed, grilled or sautéed, cut into 1/4" rounds
1 cup pasta water or chicken stock
Sea salt and pepper
1 tablespoon olive oil
1/4 cup grated cheese, Romano or Parmesan

Method

Make the pasta first. Boil a gallon of water with 2 tablespoons of kosher salt, add the fusilli, stir frequently, and cook until al dente. Turn off the flame. Strain the pasta. Reserve 1 cup of the pasta water. Return the pasta to the pot, add the butter and stir.

Heat the oil in a sauté pan, add the garlic, onions, mushrooms, and red peppers, stir and cook until lightly browned. Add the sausages and deglaze the pan with the pasta water or stock. Stir frequently over a medium flame to thicken the sauce. After 5 minutes, add the cooked pasta and continue reducing the sauce, stirring to coat the pasta.

Serve with the grated cheese.

Friday, April 4, 2008

A Promise is a Promise, but...

When I promised my wife I wouldn't talk about shellfish anymore, I'd forgotten that I'd given Mark Bittman a recipe for "Carb-Free Clams, With a Fried-Spicy Crunch". The dish is the epitome of easy-to-make. The clams are steamed for a few minutes with water and butter, which is pretty standard. The trick is the topping. That's where the "fried-spicy" part comes in. I'm very proud of the recipe. I hope you'll take a look on Mark's web site Bitten. As always, the clams are from Carlsbad Aquafarms, a regular vendor now at the Wednesday Santa Monica Farmers' Market.

Wednesday, April 2, 2008

The Care and Feeding of a Shellfishaholic

Hi, I'm Dave and I'm a shellfishaholic. My wife wants me to stop writing about shellfish because they aren't everyone's cup of tea. But I can't resist the temptation. When we were in Boston recently, the one restaurant I had to visit was the Union Oyster House. While Michael and Michelle rested at the hotel, I snuck away and happily indulged in a dozen oysters and a bowl of clam chowder.

Today at the Santa Monica Farmers' Market, Carlsbad Aquafarm had fresh oysters, clams, mussels, and live abalone. I wanted to buy everything. I showed some restraint. I only bought the oysters and clams.

A nice thing about shellfish is they keep in the refrigerator for several days as long as you follow a couple of suggestions. Oysters need to be stacked in a bowl with the rounded part of the shell down, so the oyster sits in its own liquid. Clams will drown if they're submerged in water. Save a plastic basket that comes with strawberries. Cut it in half, put it on the bottom of a bowl and the clams on top. That will keep the clams above any water they spit out while they're waiting in the refrigerator.

Breaded Oyster Sandwich

Breading usually means dredging the oysters in a egg-milk wash before rolling them in breadcrumbs. I prefer a simply seasoned olive oil mixture. The resulting oysters are lighter and crisper. As a condiment I recommend making homemade tartar sauce.

1 dozen oysters, shucked, nectar reserved for later use
1 cup bread crumbs
1 tablespoon Italian parsley, leaves only, finely
4 tablespoons olive oil
1 teaspoon sweet butter
Sea salt and pepper
2 tablespoons tartar sauce
2 small baguettes, cut in half
1 small avocado, peeled, pitted, sliced (optional)
Romaine lettuce or arugula leaves (optional)

Drizzle the baguettes with a little olive oil, then toast or grill. Pour the olive oil into a shallow bowl and season with sea salt and freshly ground black pepper. In a second bowl, mix together the bread crumbs and parsley. Roll each oyster first in the seasoned olive oil, then in the breadcrumb-parsley mix. Heat olive oil and butter in a sauté pan. Lightly brown each oyster. Turn carefully so they brown on all sides, then drain on a paper towel.

Spread the tartar sauce on the baguettes. Arrange 6 of the oysters on each baguette. Adding sliced avocado and lettuce is optional but recommended.

Serves 2. Preparation Time: 15 minutes. Cooking Time: 5 minutes.

Steamed Clams

Cooking clams is no more complicated than boiling water. The Carlsbad Aquafarm's clams are exceptionally fresh and sweet tasting.

2 pounds clams (butter clams or little necks)
1 cup water
1 tablespoon sweet butter

Put the clams, water, and butter into a pot on medium-high heat, cover, and cook for 5 minutes. Pick out any clams that haven't opened and discard. Serve the clams and their nectar in a bowl with a buttered baguette. Adding a salad turns the clams into a full meal.

Serves 2. Preparation Time: 2 minutes. Cooking Time: 5 minutes.

Tuesday, April 1, 2008

The Secret is in the Sauce

Sometimes what I crave isn't the thing itself but the sauce that goes with it. Years ago when I was a vegetarian, I did very well without eating meat except for a recurring craving for hot dogs. I couldn't go to a Dodger's game or a county fair without being taunted by the sight of a hot dog stand. Even now, writing this, my mouth waters at the thought. In time I realized it wasn't actually the hot dog that I missed, it was the mustard, relish, and chopped onions that had me questioning my commitment to vegetarianism.

I have to confess to a lack of enthusiasm for fish. Over the years I have found appetizing ways to prepare salmon, sand dabs, tuna, and sole, but fish isn't my "meat" of choice. Recently though I discovered halibut, which is quite good, if it's available fresh from a Farmers' Market. Lately I've been getting great fish from Tropical Seafood at the Sunday Palisades' Farmers' Markets. What makes the dish work, though, is homemade tartar sauce. It is delicious on the side, if the halibut is served with vegetables, or on a grilled roll, with avocado and hearts of romaine, which is how I had it for lunch today.

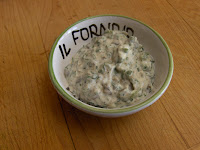
Tartar Sauce

Since there are fresh ingredients, the sauce can keep for a week if it's refrigerated in a sealed jar.

1 cup Best Foods mayonnaise
1 tablespoon capers, drained, finely chopped
2 tablespoons Italian parsley, washed, dried, leaves only, finely chopped
1 scallion, the ends cut off, finely chopped
1 teaspoon lemon juice
1 teaspoon olive oil
Pepper

Mix together.

Serves 4. Preparation Time: 5 minutes.

Breaded Halibut

The halibut can either be sautéed or baked. Traditionally when fish is breaded, an egg and/or milk wash is used to make the bread crumbs stick to the fish. I prefer using seasoned olive oil, which is lighter and adds a pleasant crunch.

1 pound fresh halibut, washed, dried
½ cup breadcrumbs
1 tablespoon Italian parsley, washed, leaves only, finely chopped
Sea salt and pepper
1 tablespoon olive oil
1 teaspoon sweet butter

Cut the halibut into 2 equal pieces. Mix the parsley into the bread crumbs. Put the bread crumbs into one flat bowl, the olive oil in a 2nd bowl. Season the olive oil with sea salt and freshly ground black pepper. Dredge the halibut through the seasoned olive oil on all sides, then through the bread crumbs. Sauté the halibut with the butter and what's left of the seasoned olive oil, or bake the fish on a Silpat sheet or piece of tin foil on a baking sheet in a 350 degree oven. Whether you sauté or bake, turn the fish over in 5 minutes.

For a sandwich, grill or toast the bread with a drizzle of olive oil. For an entrée, sauté some fresh vegetables. I like a shallot, garlic, mushroom, carrots, and spinach combination with a pat of butter for flavor. In either case, the halibut is made all the more delicious by a generous serving of tartar sauce.